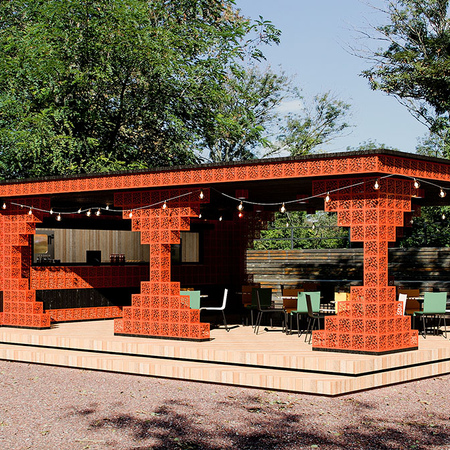
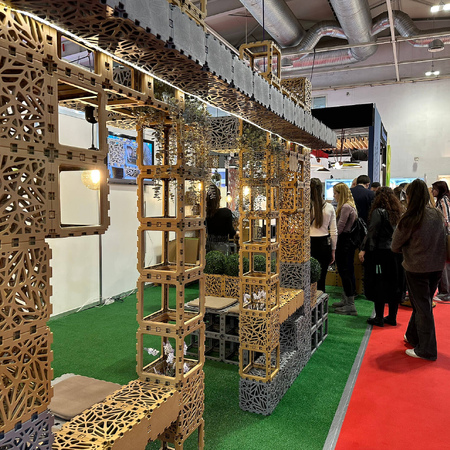
You don’t need a ceiling rig to look bright and professional. A truss-free plan is lighter, faster, and easier to reuse across shows. The idea: build light in layers (key / fill / accent), hang it from your modular frames, and keep power + cable routing clean so load-in/out stays predictable.
Start with light layers, not fixtures
Think in outcomes: what must be seen, how it should feel, and where you want attention. From there, choose portable fixtures that clamp to the frame or sit on lightweight stands - no overhead grid required.
What to aim for (in plain terms)
Most small booths work with:
- Key light for faces (talking zones) - soft, even light to avoid harsh shadows.
- Accent light for products - narrow beams on hero items, backbars, niches.
- Fill light for the scene - wide, gentle wash to lift the overall level.
- Ambient cues for mood - warm edges for hospitality, neutral white for tech.
Quick choices that travel well
- Color temperature: 2700-3000K (hospitality/food), 3500-4000K (retail/tech neutral).
- CRI 90+ for accurate colors on prints and products.
- Dimmable drivers or inline dimmers to tune on-site without ladder battles.
- Beam angles: 20-30° for accents, 60-90° for fills, wide bars for counters/walls.
Tip: Light faces from slightly above eye level and off-axis (≈30-45°) to avoid raccoon eyes and blown-out foreheads in photos.
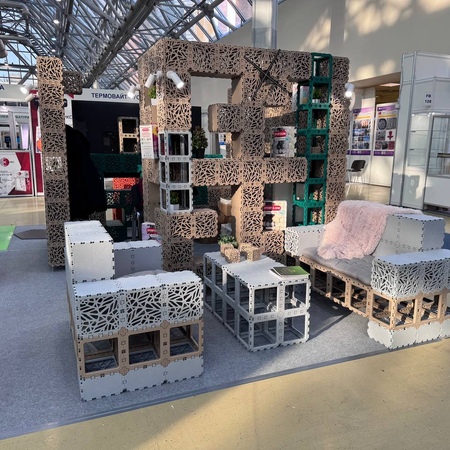
Mount cleanly to the frame: clamps, bars, and safe power
Your modular structure is a ready-made rig. Use non-marring clamps and crossbars that match module spacing, then design cable runs that disappear along uprights and edges.
Mounting options (no truss needed)
- Crossbars between uprights: span a light bar above a counter, demo, or backwall.
- Frame-edge clamps: clip small spots to verticals/horizontals; aim accents at graphics/products.
- Header shelves / soffits: hide LED strips for even, glare-free wash on brand panels.
- Freestanding poles (last resort): for corners/islands where frames don’t reach.
Cable routing that doesn’t show
- Run down a rear upright, then under counters; avoid diagonal “clotheslines.”
- Use low-profile cable covers across walkways; tie slack with velcro straps (not tape on paint).
- Keep drivers/PSUs in ventilated areas (counter base, service bay); label outputs A/B/C.
Power & safety basics
- IP rating for semi-outdoor or near entrances; avoid open gear in dusty/wet zones.
- Load and balance: don’t overload a single outlet; distribute by zone (A/B/C).
- Strain relief: every hanging cable should terminate to the frame - not the fixture plug.
- Heat & clearance: give bars/spot housings breathing room away from fabrics/graphics.
Tip: Pre-build a lighting sub-kit: clamps set to the frame gauge, pre-cut velcro straps, two 5-way IEC harnesses, and color-coded gaffer (A/B/C) for zones. It saves 20+ minutes on site.
Truss-free lighting recipes you can copy
Plan by zones, not by fixture brands: where faces need soft light, where products need punch, and where the scene needs an even base. Each setup clamps to the modular frame, hides cables along uprights, and packs into a single lighting case. Scale up by adding a second crossbar, a pair of accent spots, or another strip run - no ceiling rig required.
Inline wall + counter
Use a soft “ceiling” of light to make faces look good at the counter, then add two narrow accents to lift the logo or a product shelf. Keep glare off eye height from the aisle.
- Crossbar above the counter with a soft light bar for even face illumination.
- Two compact spots on verticals aimed at brand panel or merchandise.
- Hidden LED strip under a header/soffit to give the panel a gentle halo.
Tip: Check from aisle eye level - if the logo pops harder than faces, dim the accents by 10-20%.
Corner layout (demo + back bar)
The demo must read clearly while the back bar looks “alive.” Make the demo your key, treat the back bar with tight accents, and wash the rest softly.
- Two crossbars: one over the demo surface (soft bar), one over the back bar (broad wash).
- 3-4 narrow spots (≈20-30°) to pick out hero products.
- LED strip in the back-bar niche for even shelves without hard shadows.
Tip: Keep PSU and dimmer in the ventilated base; label circuits A/B so tweaks take seconds, not minutes.
Island layout (meetings + plinths)
Without tall stands, aim for a clean base level plus targeted accents. Visitors should feel bright, not blinded, from all sides.
- Four frame clamps with wide floods for the general fill.
- Four accent spots feathered onto plinths; one soft bar on a crossbar above the meeting table.
- A subtle perimeter strip under a header lip to create a brand halo.
Tip: Do a two-minute glare walk: step into the aisle, drop to phone-camera height, pan left/right. If you squint, nudge beam angles - not just brightness.
_450x450_390.jpeg)